
 EN
EN
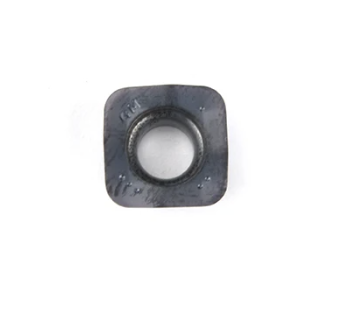
Chip pocket cleanliness directly impacts the performance and longevity of milling inserts in high-speed machining operations. When chip pockets become clogged with built-up material, coolant residue, and metal fragments, milling inserts lose their cutting efficiency and may experience premature failure. Maintaining pristine chip pockets around milling inserts ensures consistent tool performance, reduces chatter, minimizes tool breakage, and extends the operational life of your cutting tools. For manufacturing facilities running continuous production cycles, this maintenance discipline translates directly into higher productivity and lower tooling costs.
Effective chip pocket monitoring requires a systematic approach combining visual inspection, predictive sensing, and scheduled cleaning protocols. Operators and tool engineers must understand the relationship between chip accumulation patterns and cutting performance to identify problems before they damage milling inserts. By implementing best practices in chip pocket maintenance, manufacturers can prevent tool failures, improve surface finish quality, and maximize return on investment in precision cutting tools.
Understanding Chip Pocket Accumulation in Milling Inserts
How Chips Build Up Around Milling Inserts
During machining operations, metal chips generated by milling inserts must exit the cutting zone quickly and efficiently. When chip evacuation becomes compromised, fragments remain trapped around the pocket area of milling inserts, causing multiple problems. Chip pockets on milling inserts are precisely engineered geometries designed to control chip formation and direct material away from the cutting edge. When these pockets fill with hardened chips, coolant sludge, or oxidized material, the original chip evacuation path becomes blocked, forcing chips to recirculate around the milling inserts.
Root Causes of Chip Pocket Contamination
Several factors contribute to excessive chip accumulation around milling inserts. Inadequate coolant flow, improper tool geometry selection, incorrect feed rates, and spindle speed mismatches all accelerate chip buildup in the pocket areas of milling inserts. Materials with long chip formation characteristics, such as certain aluminum alloys and stainless steels, naturally create longer stringy chips that wrap around milling inserts more readily. Additionally, dull cutting edges on milling inserts produce larger, irregular chip fragments that wedge themselves into narrow pocket spaces and resist normal evacuation patterns.
Monitoring Chip Pocket Cleanliness Effectively
Visual Inspection Protocols for Milling Inserts
Regular visual inspections form the foundation of effective chip pocket maintenance for milling inserts. Operators should examine the pocket areas of milling inserts every 30 to 60 minutes during production runs, looking for discolored buildup, rust formation, or visible chip fragments lodged in the geometry. A clean pocket around milling inserts will appear bright and free of oxidation, while contaminated pockets display brown, black, or gray crusty deposits. Use magnification tools or borescope cameras to inspect hard-to-see areas where chips commonly hide on milling inserts. Document inspection findings in maintenance logs to identify patterns and predict when the next cleaning cycle will become necessary for your milling inserts.
Performance Indicators Suggesting Pocket Issues
Performance changes in cutting operations serve as early warning signs of chip pocket contamination affecting milling inserts. Increased vibration, chatter marks on workpieces, rising spindle load readings, and surface finish degradation all indicate that chip pockets on milling inserts have become compromised. Tool breakage spikes, particularly edge chipping rather than gradual wear, frequently signal that milling inserts are experiencing thermal cycling due to inconsistent coolant flow caused by blocked chip pockets. Temperature sensors on spindles often register higher values when milling inserts cannot properly evacuate chips. Monitor these indicators in real time using your machine tool's control system to catch pocket contamination early before it damages your milling inserts.
Cleaning and Maintenance Strategies for Milling Inserts
Manual Cleaning Techniques for Chip Pockets
Manual cleaning remains the most accessible and cost-effective maintenance method for milling inserts in most production environments. Remove milling inserts from the holder and use soft brass brushes or non-abrasive nylon brushes to gently remove loose chips and debris from pocket areas. Soak milling inserts in a parts cleaner solution designed for machining fluids to dissolve stubborn coolant sludge and oxidized buildup. Use ultrasonic cleaning baths specifically for milling inserts to reach narrow pocket geometries that hand brushing cannot penetrate effectively. After cleaning, rinse milling inserts thoroughly with deionized water or acetone and dry them completely before reinstalling in tool holders. This preventive maintenance cycle for milling inserts should occur every 5 to 10 tool changes or weekly during continuous production.
Coolant System Optimization for Milling Inserts
Maintaining proper coolant flow directly prevents chip pocket contamination on milling inserts by ensuring chips evacuate faster than they accumulate. Verify that coolant pressure at the tool holder meets manufacturer specifications for your milling inserts, typically 80 to 150 PSI for pocket flushing. Check coolant filter systems regularly because clogged filters reduce flow rates, degrading the chip evacuation capability around milling inserts. High-quality machining fluids with strong wetting properties help prevent chip adhesion to pocket surfaces on milling inserts. Schedule monthly coolant analysis to monitor viscosity, contamination levels, and additive concentration, all of which affect how well coolant protects milling inserts from chip buildup.
Preventive Tool Replacement Scheduling
Establishing predictable replacement intervals for milling inserts prevents situations where severely contaminated pockets damage both the cutting tool and workpiece quality. Track tool life metrics including total cutting time, number of parts produced, and cumulative hours under load for each set of milling inserts. When milling inserts approach 80 percent of predicted tool life, increase inspection frequency and reduce intervals between cleaning cycles. Retiring milling inserts proactively before pocket contamination becomes severe protects your production schedule and maintains consistent surface finishes. For high-volume production, maintain staged replacement plans where a percentage of milling inserts are replaced on fixed schedules rather than running tools to failure.
FAQ
How often should I clean chip pockets on milling inserts?
Cleaning frequency depends on material type, cutting speeds, and coolant effectiveness. Inspect milling inserts every 1 to 2 hours of continuous cutting and clean pockets whenever visible buildup appears. In aluminum machining, more frequent cleaning of milling inserts may be necessary every 30 to 45 minutes due to long chip formation. For cast iron and similar materials, milling inserts may require cleaning every 2 to 4 hours. Adjust cleaning schedules based on tool performance indicators and your production requirements.
Can dirty chip pockets damage milling inserts permanently?
Severely contaminated chip pockets can cause permanent damage to milling inserts by creating thermal stress, forcing higher cutting temperatures and pressure concentrations. While minor buildup is reversible through cleaning, extended periods with blocked pockets on milling inserts can lead to edge chipping, coating delamination, or substrate fracture that prevents reuse. Regular maintenance of milling inserts prevents this permanent damage and maximizes tool investment return.
What cleaning solutions work best for milling inserts?
Use biodegradable parts cleaners formulated for machining fluids to safely dissolve coolant residue on milling inserts without damaging coatings. Ultrasonic cleaning baths with appropriate solutions provide excellent results for complex pocket geometries on milling inserts. Avoid harsh solvents or abrasive methods that might compromise coating integrity on coated milling inserts. Always consult manufacturer guidelines for your specific milling inserts to ensure cleaning methods won't reduce tool performance or lifespan.