
 EN
EN
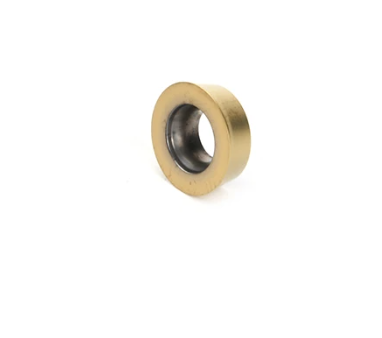
Chip pocket cleanliness is one of the most critical yet frequently overlooked factors in the performance and longevity of milling inserts. When chip pockets become clogged with debris, built-up material, or compacted swarf, the cutting geometry is compromised, heat accumulates rapidly, and the milling inserts suffer accelerated wear. Understanding how to monitor these pockets consistently and maintain their cleanliness is essential for any precision machining operation that relies on milling inserts to deliver repeatable results.
Milling inserts are designed with specific pocket geometries that allow chips to form, curl, and evacuate efficiently during cutting. When those pockets become dirty or blocked, the entire chip evacuation process breaks down. This guide explains the practical methods machinists and tooling engineers can use to monitor chip pocket condition in real time and apply structured maintenance routines that keep milling inserts performing at their best across long production runs.
Why Chip Pocket Condition Directly Affects Milling Inserts
The Role of Chip Pockets in Cutting Performance
Chip pockets serve a fundamental mechanical purpose around milling inserts. They create the space necessary for chips to form cleanly and exit the cut zone without re-entering the workpiece surface. When milling inserts operate with clean, open pockets, chips flow freely and cutting forces remain predictable. Dirty or packed pockets force milling inserts to re-cut chips, which raises cutting temperatures dramatically and causes edge chipping, plastic deformation, and premature flank wear. The geometry of milling inserts is precision-engineered, and any obstruction in the pocket area undermines that engineering completely.
Signs That Milling Inserts Have Dirty Chip Pockets
Operators working with milling inserts should watch for several warning signs that indicate deteriorating chip pocket cleanliness. Surface finish degradation on the workpiece is often the earliest visible symptom, as compacted chips dragged across the surface leave marks that are difficult to remove in post-processing. Unusual vibration or chatter during cutting is another key indicator, since blocked chip pockets change the dynamic balance of the milling inserts and the cutter body. Increased spindle load readings on CNC machine controllers also correlate with chip pocket contamination around milling inserts, because the machine must work harder to push through re-cut material. Monitoring these signals consistently allows maintenance teams to intervene before milling inserts sustain irreversible damage.
How to Monitor Chip Pocket Cleanliness in Real Time
Visual and Tactile Inspection Techniques
The most direct method for monitoring chip pocket condition around milling inserts is scheduled visual inspection. After each machining cycle or at defined intervals, operators should remove milling inserts from the cutter body and use a magnifying loupe or inspection microscope to examine pocket surfaces for built-up edge material, compacted chips, or coating damage. Tactile inspection with a soft brass pick allows technicians to probe pocket corners where milling inserts seat, identifying any hard deposits that could prevent proper insert seating and affect cutting geometry. Combining visual checks with tactile probing gives the most complete assessment of pocket cleanliness around milling inserts.
Using Machine Data to Detect Pocket Contamination
Modern CNC machining centers provide data streams that can serve as indirect monitors of milling inserts pocket health. Spindle torque trends logged over a batch of parts reveal gradual increases that often correspond with chip pocket buildup on milling inserts. Similarly, acoustic emission sensors placed near the spindle can detect the high-frequency noise signature produced when milling inserts re-cut chips inside blocked pockets. Some advanced tooling management systems allow engineers to set threshold alerts tied to these signals, triggering automatic tool change or inspection cycles when milling inserts approach contamination-related performance boundaries. Integrating machine data monitoring with physical inspection creates a robust, layered approach to keeping milling inserts clean and productive.
Practical Maintenance Methods for Chip Pocket Cleanliness
Cleaning Procedures Between Insert Changes
Maintaining clean pockets around milling inserts requires a structured cleaning process every time inserts are rotated or replaced. The cutter body should be cleaned with a dedicated pocket cleaning brush before reseating milling inserts. Compressed air directed at the pocket surfaces removes loose chips and dust, while a solvent-dampened cloth or ultrasonic cleaning bath dissolves stubborn coolant residue and built-up edge material that clings to the surfaces supporting milling inserts. Brass or soft aluminum tools should be used exclusively for mechanical cleaning to avoid scratching the precision pocket surfaces that locate milling inserts correctly. Any visible scoring or deformation of the pocket itself must be assessed, as damaged pocket seats force milling inserts into misalignment and amplify wear rates.
Coolant Strategy and Its Impact on Milling Inserts
Coolant delivery plays a significant role in the cleanliness of chip pockets around milling inserts. High-pressure coolant directed precisely at the cutting zone flushes chips away from milling inserts before they compact into pockets. Through-spindle coolant is particularly effective for milling inserts operating in deep pockets or confined geometries where chip evacuation is naturally restricted. Coolant concentration and cleanliness also matter, because contaminated coolant deposits residue directly onto milling inserts and pocket surfaces, accelerating buildup. Operators should verify coolant pH and concentration at regular intervals and filter the coolant supply to remove chip fines that would otherwise recirculate and redeposit around milling inserts. Matching coolant pressure and flow direction to the specific geometry of milling inserts improves evacuation efficiency and reduces maintenance frequency significantly.
FAQ
How often should chip pockets around milling inserts be cleaned?
The cleaning frequency depends on the material being cut and the cutting conditions applied to milling inserts. In high-volume production of sticky or gummy materials like aluminum alloys or stainless steel, chip pockets around milling inserts should be inspected and cleaned at every insert rotation. For harder, more brittle materials where chip evacuation is naturally efficient, cleaning can be performed every second or third insert change cycle for milling inserts in standard configurations.
Can coated milling inserts resist chip pocket contamination better than uncoated ones?
Coated milling inserts generally offer better resistance to built-up edge formation because modern coatings such as DLC, TiAlN, or AlCrN reduce the friction and chemical affinity between the insert surface and the workpiece material. This means coated milling inserts accumulate built-up edge material more slowly than uncoated carbide grades. However, coated milling inserts still require regular pocket cleaning, as the cutter body pockets themselves are not coated and will collect chips and debris regardless of the insert surface treatment.
What tools are safe to use when cleaning pockets that hold milling inserts?
Safe tools for cleaning pockets holding milling inserts include soft brass brushes, brass picks, lint-free cloths dampened with isopropyl alcohol or approved cutting fluid solvents, and compressed air. Hard steel tools must never be used to scrape pockets that seat milling inserts, as they leave scratches that alter insert positioning and introduce stress concentrations. Ultrasonic cleaning tanks filled with an appropriate solution are also highly effective for fully removing hardened residue from cutter bodies that carry milling inserts, without risking mechanical damage to the seating surfaces.